
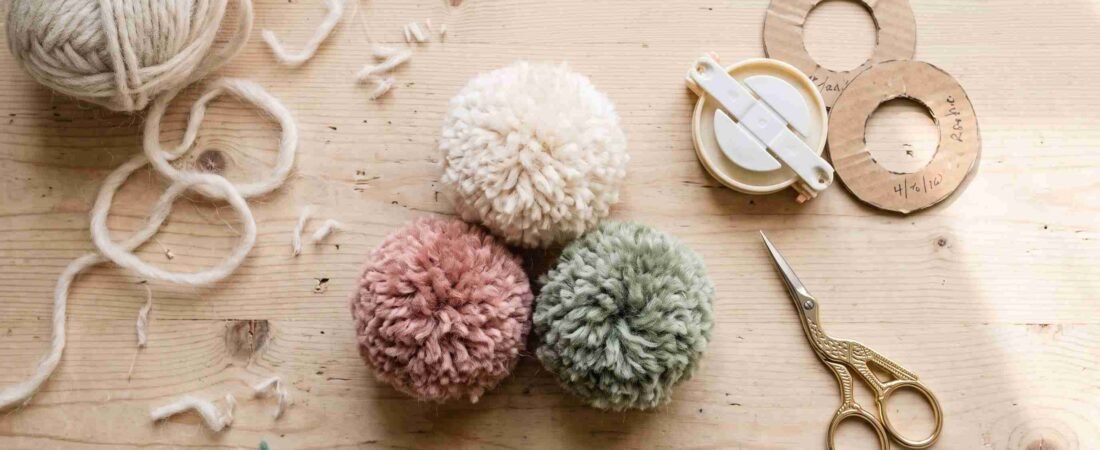
fluffy yarn pom poms can turn a plain hat into a cheerful winter staple or give a gift a soft, handmade finish. It also adds color and texture to scarves, garlands, blankets, and other crafts. The trick is getting a round, full shape without trimming away too much yarn.
Fuzzy yarn can hide the loops as you work, so it’s harder to judge how much to wrap. Hand wrapping is quick for one or two pom poms, cardboard templates help you repeat a size, and a pom-pom maker speeds up a small batch. Choose the method that fits your project and the tools you have.
Choose yarn and tools for fluffy yarn pom poms
Match yarn to your pom pom
Yarn thickness affects how quickly you build volume. Bulky yarn makes a full pom pom with fewer wraps, while finer yarn takes more layers to look dense. Soft, fuzzy yarn creates a cloudlike finish, but its fibers can blur the outline.
Think about where the pom pom will go. A plush, oversized one suits a winter hat or gift topper, while a smaller, firmer pom pom works well on a scarf or garland. If the yarn is very fuzzy, take extra care with the center tie; it needs to hold the hidden strands together.
Gather simple tools before you wrap
Set out sharp scissors, yarn, and a strong, smooth strand for tying the center. You can use sturdy thread or a less fuzzy yarn for the tie, which is easier to pull tight than a soft, slippery strand. Add cardboard or a pom-pom maker if you plan to use a template.
Keep the center-tie strands long if you’ll sew the pom pom onto a hat or attach it to a garland. That small choice saves you from threading a new piece through the finished fluff later.
Test unfamiliar yarn first
Make one small sample before starting a whole set. Some fuzzy yarns hide the center and make the pom pom look full even when it has only a few strands; others need more wraps to fill out. A test also shows how the yarn behaves when cut and trimmed.
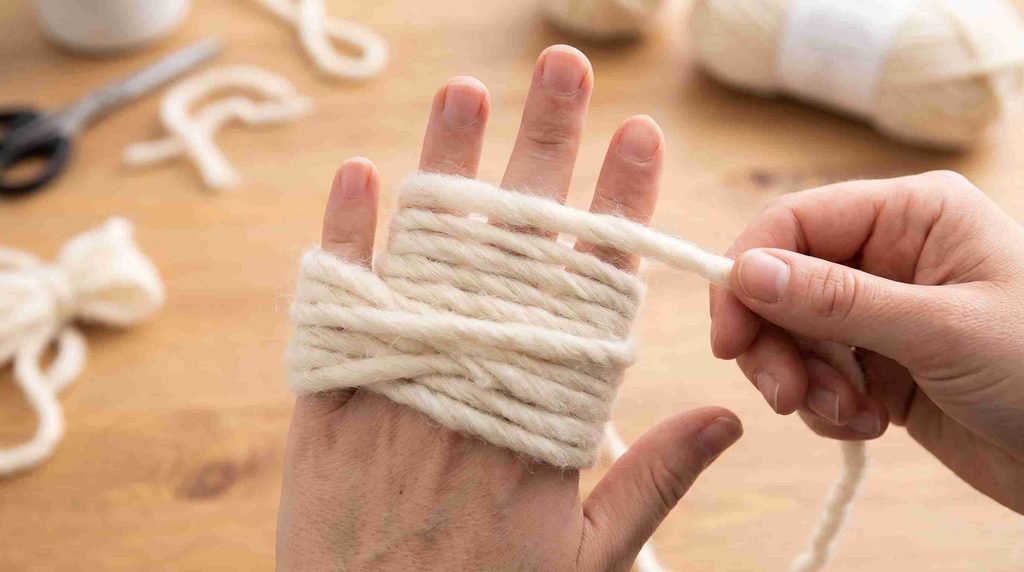
Make fluffy yarn pom poms by wrapping yarn around your hand
Wind the yarn around your fingers
Hold one end of the yarn against your fingers and wrap it around them at an even pace. Keep the loops snug, but not so tight that you can’t slide the bundle off. More wraps usually make a denser pom pom, though very bulky yarn needs fewer.
The width of your fingers sets the rough size. For a small pom pom, wrap around two or three fingers; for a larger one, use four. Leave enough room to reach the yarn bundle and tie its center.
Tie, cut, and shape the loops
Carefully slide the loops off your hand while keeping them together. Wrap a separate length of strong yarn around the middle, pull it tight, and knot it firmly. Tie the bundle before cutting its loops so the strands stay gathered.
Snip through the loops on both sides, then shake out the strands. The first cut may look shaggy and uneven. Rotate the pom pom as you trim, taking off a little at a time until it looks round.
Shape repeatable fluffy yarn pom poms with a cardboard template
Cut two matching cardboard rings
Trace two circles onto sturdy cardboard, then draw a smaller circle in the middle of each. The space between the inner and outer circles sets the pom pom’s size: a wider ring makes longer strands. Cut out both rings and add a narrow slit from the outer edge to the center hole.
Place the rings together with their slits lined up. This paired-ring style gives the yarn a guide and makes it easier to repeat a size. For a clear visual example, see Stitch & Story’s cardboard pom-pom tutorial.
Wrap, tie, and remove the cardboard
Wind yarn around both rings, passing it through the center hole and back around the outside. Cover the cardboard evenly, adding layers until the ring feels plump. Keep the yarn loose enough to move along the ring, but wrap enough to build a full shape.
Slide scissor tips between the two cardboard rings and cut the loops around the outer edge. Hold the bundle in place as you work, then pass a strong strand between the rings and tie it tightly around the center. Ease the cardboard away without tugging the cut strands loose.
Trim while keeping the tie safe
Hold both ends of the center tie as you shape the pom pom. Use small snips and turn the bundle often, cutting only the strands that stick out. Avoid cutting close to the knot or trimming so far that the center shows through.
Make repeatable fluffy yarn pom poms with a pom-pom maker
Fill both sides evenly
Open the maker’s arms and wrap yarn across one side, then the other. Aim for similar coverage on both halves so the finished pom pom looks balanced. If the yarn is bulky, stop before the arms feel hard to close.
A maker is handy when you need several pom poms in a similar size, such as for a garland or matching hats. Keep the same yarn and roughly the same amount of wrapping for each one. The first pom pom gives you a useful guide.
Cut the yarn and tie the center
Close the arms, then cut the loops along the maker’s grooves. Work carefully so the scissors follow the channels and don’t nick the tool. Before opening it, wrap a firm tie around the center and knot it securely.
Remove and check the shape
Open the maker and lift out the pom pom gently. Give it a shake, then look for thin patches or long strands that need a trim. A few small snips can smooth the outline without reducing its fullness.
Fluff and finish fluffy yarn pom poms
Trim slowly for a soft outline
Rotate the pom pom as you trim so one side doesn’t end up shorter than the rest. Take off small amounts, especially with fuzzy yarn, which can hide uneven spots until you cut into it. Stop when the shape looks round from more than one angle.
Fix loose or thin spots
If strands slide out, the center tie may need a firmer knot. Before adding more yarn, check that the tie crosses the middle and holds the bundle securely. You can also spread strands by hand to cover a small thin area.
For a larger gap, tuck in a few matching yarn strands and tie them around the center if you can reach it. Then trim the new strands to match the rest. Work gently; pulling on fuzzy fibers can loosen nearby strands.
Attach it without flattening the fluff
Use the long center ties to sew or knot the pom pom onto a hat, scarf, gift, or garland. Secure it with a few firm stitches or knots, then trim any tie ends that won’t be used. Fluff the pom pom with your fingers once it’s attached.
Pick the method that fits your project : fluffy yarn pom poms
Hand wrapping is fast and needs no special tool. Cardboard rings help you repeat a chosen size, while a pom-pom maker makes it easier to produce several similar pom poms. Each method can create a soft, full finish when you tie the center firmly and shape the yarn with care.
Make a test pom pom if you’re unsure how your yarn will behave. Then choose your method, wrap a full bundle, and trim slowly. A few minutes of shaping can turn loose yarn into a cheerful detail ready for your next craft.
Discover more about yarn pom pom : How to Make a Yarn Pom Pom
Frequently Asked Questions
What are fluffy yarn pom poms used for?
Fluffy yarn pom poms are soft balls of yarn used to decorate hats, scarves, gifts, and crafts. You can also string them together for garlands or add them to toys.
How do I choose yarn for fluffy pom poms?
Choose soft, bulky yarn with plenty of fibers if you want a full, fuzzy pom pom. Smooth or thin yarn makes a neater, less fluffy result.
How do you make fluffy yarn pom poms that stay together?
Wrap yarn around a pom pom maker or a piece of cardboard, then tie the middle tightly before cutting the loops. Leave long tie ends so you can secure the pom pom to a project.
Why does my yarn pom pom keep falling apart?
A pom pom often falls apart because its center knot is too loose or the yarn strands are too short. Tie the center firmly, and avoid trimming so much that you cut into the knot.
Can you wash fluffy yarn pom poms?
Some can be washed, but the result depends on the yarn fiber and how firmly the pom pom is tied. Check the yarn label, and hand-wash gently if machine washing is not recommended.
How much do fluffy yarn pom poms cost?
The cost varies with their size, yarn, and whether they are handmade or sold in a pack. Making your own can use leftover yarn, but you may need a pom pom maker or other tool.